A hipot failure late in verification is rarely caused by the tester alone. More often, the root cause sits upstream – unclear test limits, fixture leakage, poor grounding, or a mismatch between the device design and the applied standard. A practical medical device hipot compliance checklist helps teams catch those issues before they affect validation, production release, or audit readiness.
For medical device manufacturers, hipot is not just a pass-fail station on the line. It is one part of a broader electrical safety strategy that has to align with design intent, risk management, applicable standards, and documented test control. That means the checklist needs to cover more than voltage and dwell time. It should also address the test method, the hardware setup, data integrity, and the rationale behind each limit.
What a medical device hipot compliance checklist should cover
A useful checklist starts with a basic question: what are you trying to prove with the test? In medical applications, hipot is typically used to verify dielectric integrity between isolated circuits, applied parts, mains-connected sections, accessible conductive surfaces, and protective earth paths, depending on device class and architecture. The exact requirement depends on the product category and the standard used for evaluation.
That is where many teams oversimplify. They treat hipot as a generic electrical withstand test and apply a house rule across multiple products. In reality, acceptable test voltage, ramp profile, current limit, and pass criteria can vary significantly between a bench instrument, a patient-connected system, and a production subassembly. A checklist should force that distinction early, before the test procedure is locked.
Start with standards and device classification
Before defining any electrical safety test, confirm the governing standard set for the product. For many medical electrical devices, IEC 60601-1 is central, but it may not be the only requirement. Particular standards, collateral standards, market-specific deviations, and internal customer requirements can all influence the final hipot method.
Your checklist should verify the device classification, insulation scheme, and intended use environment. For example, means of patient protection and means of operator protection are not interchangeable concepts. The required dielectric withstand level depends on the insulation barrier being evaluated and the risk profile associated with that barrier. If your team has not tied each hipot test step to a named insulation path and a standard-based requirement, the procedure is not mature enough.
This is also the stage to confirm whether testing is being performed during design verification, routine production, incoming inspection, service, or failure analysis. Those use cases may justify different limits or methods. A verification test can be more exhaustive than a production screen, while a production test may need tighter control of throughput, operator interaction, and fixture repeatability.
Define the test method before selecting the limits
The most effective medical device hipot compliance checklist separates the test objective from the instrument settings. Start by documenting what nodes are being stressed, what isolation barrier is under test, and whether AC or DC hipot is appropriate.
AC hipot can expose insulation weakness under alternating stress and is common in safety evaluations, but it introduces higher reactive current, which can complicate interpretation for capacitive products. DC hipot reduces charging current after stabilization and may be easier to control in some production environments, but it is not automatically equivalent for every compliance need. The right choice depends on the applicable standard, the product construction, and the reason for testing.
Once the method is chosen, define ramp time, dwell time, trip thresholds, and discharge behavior. A common error is to set a current limit based on instrument capability rather than realistic leakage expectations for the device under test. That can either create nuisance failures or mask a true insulation issue. Good procedures use engineering data, precompliance characterization, and documented rationale.
Checklist items for the test setup
At the setup level, the checklist should confirm that the tester has sufficient voltage accuracy, measurement resolution, and safety interlocks for the application. In regulated environments, calibration status and traceability matter as much as basic functionality. If the tester is out of calibration or lacks documented verification, the data may not be defensible.
Fixture design needs similar scrutiny. High-voltage testing is sensitive to lead dress, stray capacitance, connector quality, and contamination. A fixture that performs well on a low-voltage continuity check can still create instability during hipot. The checklist should require inspection of insulation spacing, guarding where applicable, return path integrity, and repeatable DUT placement. It should also address environmental factors such as humidity, debris, and residue from manufacturing processes.
Operator safety belongs here as well. Medical device production teams sometimes focus so heavily on product compliance that they under-document test-station protections. Verify enclosure interlocks, emergency stop behavior, clear high-voltage indication, access control, and safe discharge sequencing. These are not secondary issues. They are part of a disciplined test process.
Validate the limits with real product behavior
A checklist is only useful if the programmed limits reflect the actual device. That means validating the test on representative units across expected production variation. Engineering samples that were hand-built under ideal conditions may not represent line behavior once tolerances stack up.
This step should include characterization of normal leakage current, charging current effects, and expected variation across temperature, humidity, and assembly differences where relevant. If borderline behavior appears during ramp-up or discharge, do not assume the unit is bad. Review the waveform, timing, and fixture contribution. In some cases, a limit adjustment is justified. In others, the product design or insulation system needs attention.
For complex systems, subassembly testing may be useful, but it introduces trade-offs. Testing earlier in the build can improve fault isolation and reduce scrap cost. At the same time, subassembly hipot does not always represent the final electrical environment of the complete device. The checklist should make clear which barriers are verified at each stage and which are only valid at final assembly.
Documentation and data integrity are part of compliance
A medical device hipot compliance checklist is incomplete if it stops at the bench. Auditors and quality teams will want to see that the procedure, limits, revisions, and results are controlled. That includes the approved work instruction, the software or program revision running on the tester, calibration records, operator training status, and clear pass-fail records tied to serial numbers or lot numbers.
Data capture should be consistent enough to support trend analysis, not just disposition. Repeated near-limit readings, even when they pass, may indicate fixture wear, contamination, component drift, or process instability. If your system records only a final pass bit, you lose the opportunity to see that pattern early.
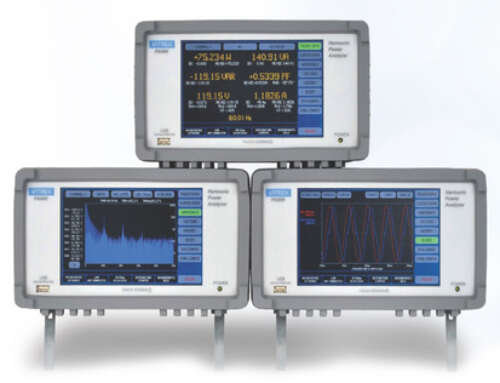
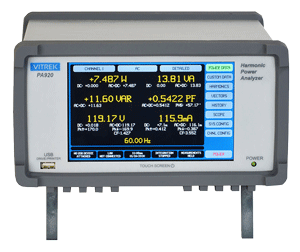
For that reason, many manufacturers prefer test platforms that support programmable sequences, controlled access, and exportable result data. In a regulated environment, repeatability is not only a productivity issue. It is a compliance issue. Vitrek systems are often selected in these environments because they support precise safety test control and data-driven validation workflows rather than basic standalone screening.
Common gaps the checklist should catch
Most hipot escapes come from a short list of preventable issues. One is using inherited limits from a prior product without revalidating them against the new insulation architecture. Another is failing to account for capacitive loading, which can make normal charging current look like a defect. A third is poor fixture maintenance, especially in high-mix manufacturing where adapters are changed frequently.
There is also the question of destructive margin. Some teams push production hipot too close to design stress limits in the name of screening strength. That can reduce long-term reliability or create latent damage in sensitive assemblies. Others go too conservative and lose meaningful defect detection. The right balance depends on the insulation system, the purpose of the test, and what other controls are already in place.
A well-built checklist should therefore require formal review whenever the design changes, the standard basis changes, the fixture changes, or the failure pattern shifts. Hipot is not a set-it-and-forget-it process.
A working checklist for engineering and production
In practice, the checklist should confirm six things before release. First, the product classification and applicable standard requirements are documented. Second, each hipot step is mapped to a specific insulation barrier and test objective. Third, the instrument, fixture, and safety controls are verified and current. Fourth, the programmed limits are supported by engineering characterization and validation data. Fifth, the procedure and revision controls are in place, including operator instructions and training. Sixth, the result data is captured in a way that supports traceability and trend review.
If any one of those six areas is weak, the test may still produce a pass signal, but it will not produce a strong compliance position.
Medical device electrical safety testing rewards discipline more than speed. A checklist should do more than keep operators on sequence. It should help engineering, quality, and manufacturing prove that the test is technically valid, repeatable, and appropriate for the device being built.